Getting Started
Objective
Example Scenario
Emily is a user of your app, and she wants to link to her bank accounts at Mikomo Financial so she can view personal financial data from your app. You will leverage Akoya’s APIs to ensure data is shared in a safe manner.
Emily will authenticate to Mikomo Financial via Akoya. She will enter her credentials on Mikomo’s authentication page and specify which accounts she wants to share with your app. Once completed, she’ll be returned to your app’s redirect URI. At this point, your app can retrieve her data using our financial data API products.
What You'll Do
- Obtain an authorization code. During this process, you will use a test account, GenericUser_Pfm, to emulate Emily granting permission to Mikomo Financial to send her financial data to your app via Akoya.
- Exchange the authorization code for an ID token and a refresh token. The ID token proves that Emily has granted your app permission to pull her financial data from Mikomo Financial via Akoya. The refresh token is used to retrieve a new ID token after the latter expires.
- Obtain Emily’s financial data. You’ll first make a call for all account data, and then you’ll retrieve data for a single account.
Prerequisites
You should have the following before starting this exercise:
- A Data Recipient Hub account. A team lead or equivalent should set up a company account in the Data Recipient Hub and add you as a team member from “My company.”
- Sandbox app with client ID and secret (API credentials). Obtain these from the Data Recipient Hub when you register your sandbox app. You can use our demo redirect URI
https://recipient.ddp.akoya.com/flow/callback.
If you need help, please see the “Need help?” section.
Setting up Your Environment (optional)
Forking Projects Locally
We offer a hosted development platform for our test apps, but you can also fork them locally. Below are the GitHub repos:
Go
Go version 1.21 or higher required if forking Go projects locally.
Using Apps in CodeSandbox
If you want to use the apps locally, fork the repos into your GitHub account, clone them to your local machine, and continue to Step 1.
You’ll need to sign into the CodeSandbox platform with your own GitHub account to run the apps. Below are the repos. CodeSandbox will automatically create a draft branch for you to edit. If you want to keep any changes you make to the app after signing out, you’ll need to fork the project into your GitHub account.
You’ll need to sign into the CodeSandbox platform with your own GitHub account to run the apps. Below are the repos. Click the “Create branch” button to create a draft branch for you to edit in the current session. If you want to keep any changes you make to the app after signing out, you’ll need to fork the project into your GitHub account and then import the fork into CodeSandbox:
- Click the down arrow next to “Create branch.”
- Select “Fork project.”
- In the left navigation, select “Find by URL.”
- Paste in the GitHub repo URL for the step you’re working with.
- Click “Import.”
- Click “Fork Repository.” This step will fork the repo to your GitHub account and import the fork into CodeSandbox.
- Click the hamburger menu at the top left and select view | terminal to open a terminal window.
If you choose to fork the projects and import them, we recommend that you import all three apps before starting the exercise to save time.
Go
These instructions will assume you’re using CodeSandbox for this exercise, but if you’re forking the projects locally, you can still follow along. If you run into any technical issues with the platform, click the square icon at the top left and select “Restart branch.”
Please read steps 1 and 2 before starting. The authorization code expires after five minutes and ID tokens expire after about 15 minutes, so you’ll have to work quickly.
Tip
Right-click the step links and select “Open in new tab” to avoid navigating away from this page.
Please see the readme file in each GitHub repo for the latest notes and instructions.
Authorization code expires in 5 minutes
Please read through Step 2 before starting, as you’ll only have five minutes to exchange your authorization code for ID and refresh tokens.
Emily has previously chosen to connect to Mikomo Financial. In this step, your app will redirect her to Mikomo’s sign in page via Akoya where she will be prompted to enter her sign in credentials and grant permission for account access. When she’s done, an authorization code will generate. You will use Akoya’s sandbox identity server to obtain the code since you're dealing with test data.
// 1. Navigate to the go-fetch-auth-code project you forked in CodeSandbox and
// display the file explorer.
// 2. Open main.go, paste your client id under the relevant TODO comment, and
// save the file (CTRL + S).
// 3. Run run.sh in the terminal. You’ll receive a notification that port 8123
// has been opened. Click “Open Externally.”
// --------------------------------------------------------------

// main.go
// Some code here
const (
	// TODO: Paste your client ID obtained from the Data Recipient Hub.
	ClientId = "<paste your client id here>"
)
// App continues here
When this app runs, Akoya’s sandbox IDP server will be contacted with your client ID. You (or Emily in our fictional scenario) will authenticate at Akoya’s mock provider Mikomo Financial and grant permission for account access. When this process completes, Emily will be sent to your redirect URI, https://recipient.ddp.akoya.com/flow/callback.
Alternatively, you can obtain an auth code by pasting this into a browser. Substitute {{clientId}} with your value.
https://sandbox-idp.ddp.akoya.com/auth?connector=mikomo&response_type=code&client_id={{clientid}}&redirect_uri=https://recipient.ddp.akoya.com/flow/callback&scope=openid%20profile%20offline_access&state=appstate
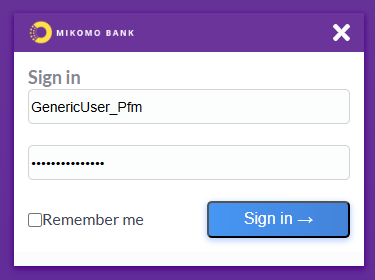
Your app has just directed Emily to Mikomo Bank to grant her consent for account access. Use the test user GenericUser_Pfm to authenticate. Enter GenericUser_Pfm as the username and password.

Mikomo sign-in screen
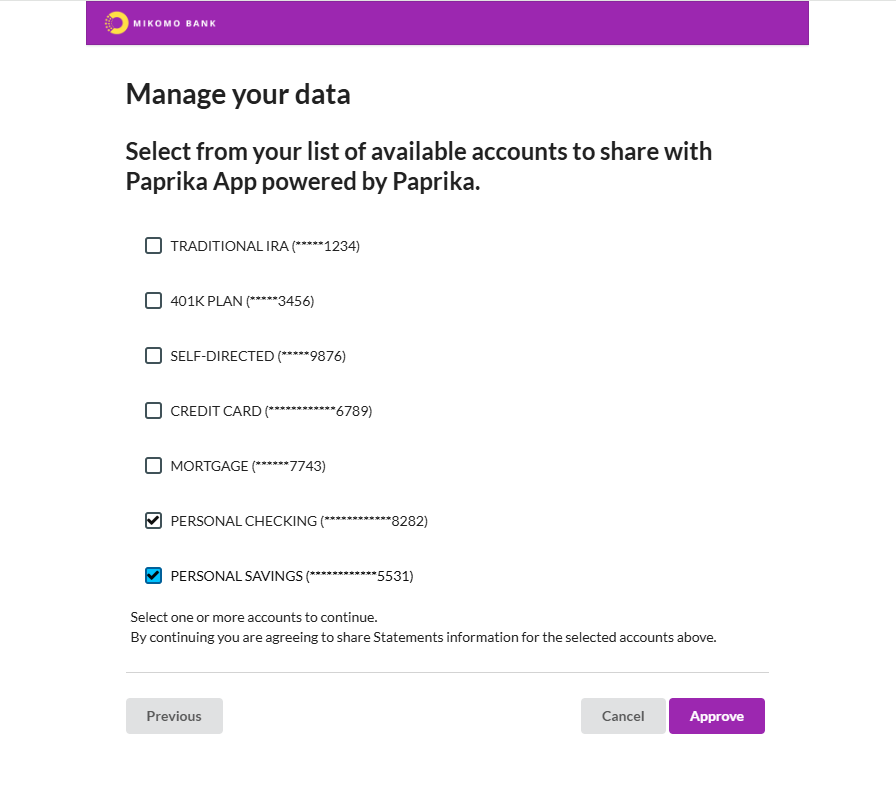
You, acting as Emily, will be asked to select the accounts to share. Once you click “Approve,” you will be taken to your app’s redirect URI. This action will also return the authorization code grant. The authorization code is used in lieu of a password to obtain ID and refresh tokens.

Select the checking and savings accounts and click "Approve."
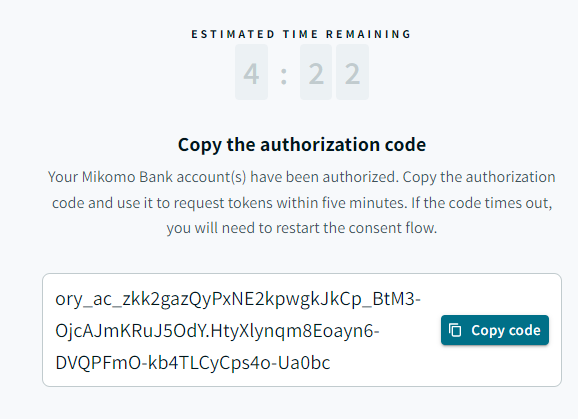
The authorization code will appear in the browser window. Copy it to your favorite text editor. You must exchange it for ID and refresh tokens within five minutes.

Authorization code
Type CTRL+C to kill the running app and close the browser tab before moving on.
Please read this step before starting; assume that ID tokens expire after 15 minutes.
In this step, you use the Token API to exchange the authorization code for a set of ID and refresh tokens. You’ll need the ID token to request data from Mikomo via Akoya.
How the Token Flow Works
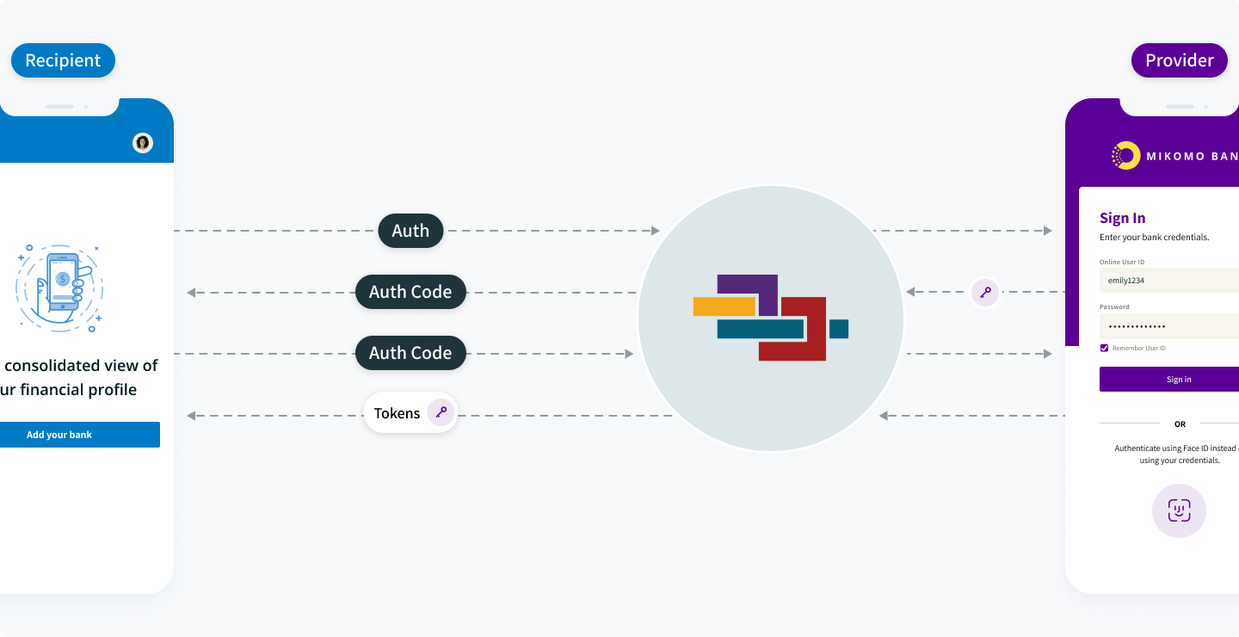
Emily has selected Mikomo Financial, signed in to Mikomo’s authorization portal, and granted permission for your app to have access to account data. Your app receives an authorization code. You then exchange the authorization code for ID and refresh tokens. The ID token is a short-lived token used to retrieve account data, and the refresh token is used to issue a new ID token when it expires.

// 1. Kill the Step 1 app in the CodeSandbox terminal window (CTRL + C).
// 2. Navigate to the go-exchange-auth-code-for-token forked project in CodeSandbox.
// 3. Replace the values for the ClientId and Secret constant variables with your
// credentials.
// 4. Open a terminal window, and run the run.sh script, just as you did in step 1.
// You’ll receive a notification that port 8123 has been opened. Click
// “Open Externally.”
// 5. Paste your auth code from step 1 into the text box in the web page that displays and click “Get an access token.”
// -------------------------------------------------------

// main.go

// Some code here

const (
	// TODO: Paste in your sandbox creds obtained from the Data Recipient Hub.
	ClientId = "<your client id goes here>"
	Secret   = "<your secret goes here>"
)

// Code continues here . . .
curl --request POST
  --url 'https://sandbox-idp.ddp.akoya.com/token' --user {{client_id}}:{{client_secret}}
  --header 'accept: application/json'
  --header 'content-type: application/x-www-form-urlencoded'
  --data grant_type=authorization_code
  --data redirect_uri={{redirect_uri}}
  --data code={{code}} | jq

# | jq is optional
A JSON object will appear on the screen containing the ID and refresh tokens. Copy the ID token to your favorite text editor, as you’ll need it to retrieve data.
Troubleshooting
- If the authorization code expires, repeat Step 1.
- To reset a forgotten client secret, sign into the Data Recipient Hub.
Type CTRL+C to kill the running app and close the browser tab before moving on.
You can now pull Emily’s account data from Mikomo. You’ll use the Account Information product in this example. The /accounts-info endpoint in this product retrieves basic account information including accountId, masked account number, type, description, etc.
The accountId is a unique account identifier that we use in place of a real account number. It’s used in many of our products to obtain data from specific accounts.
When used without a specific accountId, the /accounts-info endpoint will pull a list of all accounts. For this first data call, we don’t have any account IDs for Emily’s accounts, so we’ll call the endpoint without them to retrieve a list of all accounts.
// 1. Kill the Step 2 app (CTRL + C).
// 2. Navigate to the go-fetch-accounts forked project in CodeSandbox.
// 3. Run the run.sh script. You’ll receive a notification that port 8123 has been
// opened. Click “Open Externally.”
// 4. Paste in the ID token from step 2 into the box provided.
//-------------------------------------------------------------

// main.go
r.POST("/api/received-accounts", func(c \*gin.Context) {
		accountsUrl := "<https://sandbox-products.ddp.akoya.com/accounts-info/v2/mikomo">
		token := c.PostForm("token")
		req, err := http.NewRequest("GET", accountsUrl, nil)
		// Code continues here . . .
curl --request GET
  --url '<https://sandbox-products.ddp.akoya.com/accounts/v2/mikomo'>
  --header 'accept: application/json'
  --header 'authorization: Bearer {{id_token}}' | jq

# | jq is optional
The page will return a JSON object containing all accounts for GenericUser_Pfm.
Now, let’s say you just want Emily’s checking account information. All you need to do is repeat the call but specify the desired accountId in the accountIds query param this time:
// 1. Run the run.sh script again. Only the checking account will be returned.
// -------------------------------------------------------------------------

// main.go
r.POST("/api/received-accounts", func(c \*gin.Context) {
		accountsUrl := "<https://sandbox-products.ddp.akoya.com/accounts-info/v2/mikomo?accountIds=e0f0d28a24c24baad05d78fbabb9e">
		token := c.PostForm("token")
		req, err := http.NewRequest("GET", accountsUrl, nil)
		// Code continues here . . .
curl --request GET
     --url '<https://sandbox-products.ddp.akoya.com/accounts-info/v2/mikomo?accountIds=e0f0d28a24c24baad05d78fbabb9e'>
     --header 'accept: application/json'
     --header 'authorization: Bearer {{id_token}}' | jq
     # The | jq is optional
Troubleshooting
If you receive this error, please repeat Steps 1 and 2 to generate a new authorization code and set of tokens.
{
    "code": 602,
    "message": "Customer not authorized"
}
Experiment!
The draft branches are yours to experiment with as you see fit. Explore with the code base and use it to place calls to our other APIs.
Next Steps
Explore the API docs to learn more about our products.
| Date | Update |
|---|---|
| 2025-Sept-22 | Changed the test user for the examples |
| 2024-Oct-28 | Minor clarifications based on customer feedback |
| 2024-Sept-24 | Minor updates |
| 2024-Aug-30 | Original |
Need Help?
Visit the Support Center in the Data Recipient Hub.
Looking for Provider Nuance Documentation?
All provider nuance documentation is available in the Data providers section in the Data Recipient Hub.
Still Stuck?
For all production issues, submit a support ticket through the Data Recipient Hub. Our support team is standing by 24/7. Questions and non-production issues will be answered during business hours.
Updated 3 months ago