My apps
You can only have one sandbox app
You’re only allowed to have one app in our sandbox environment at a time.
Registering your app in sandbox
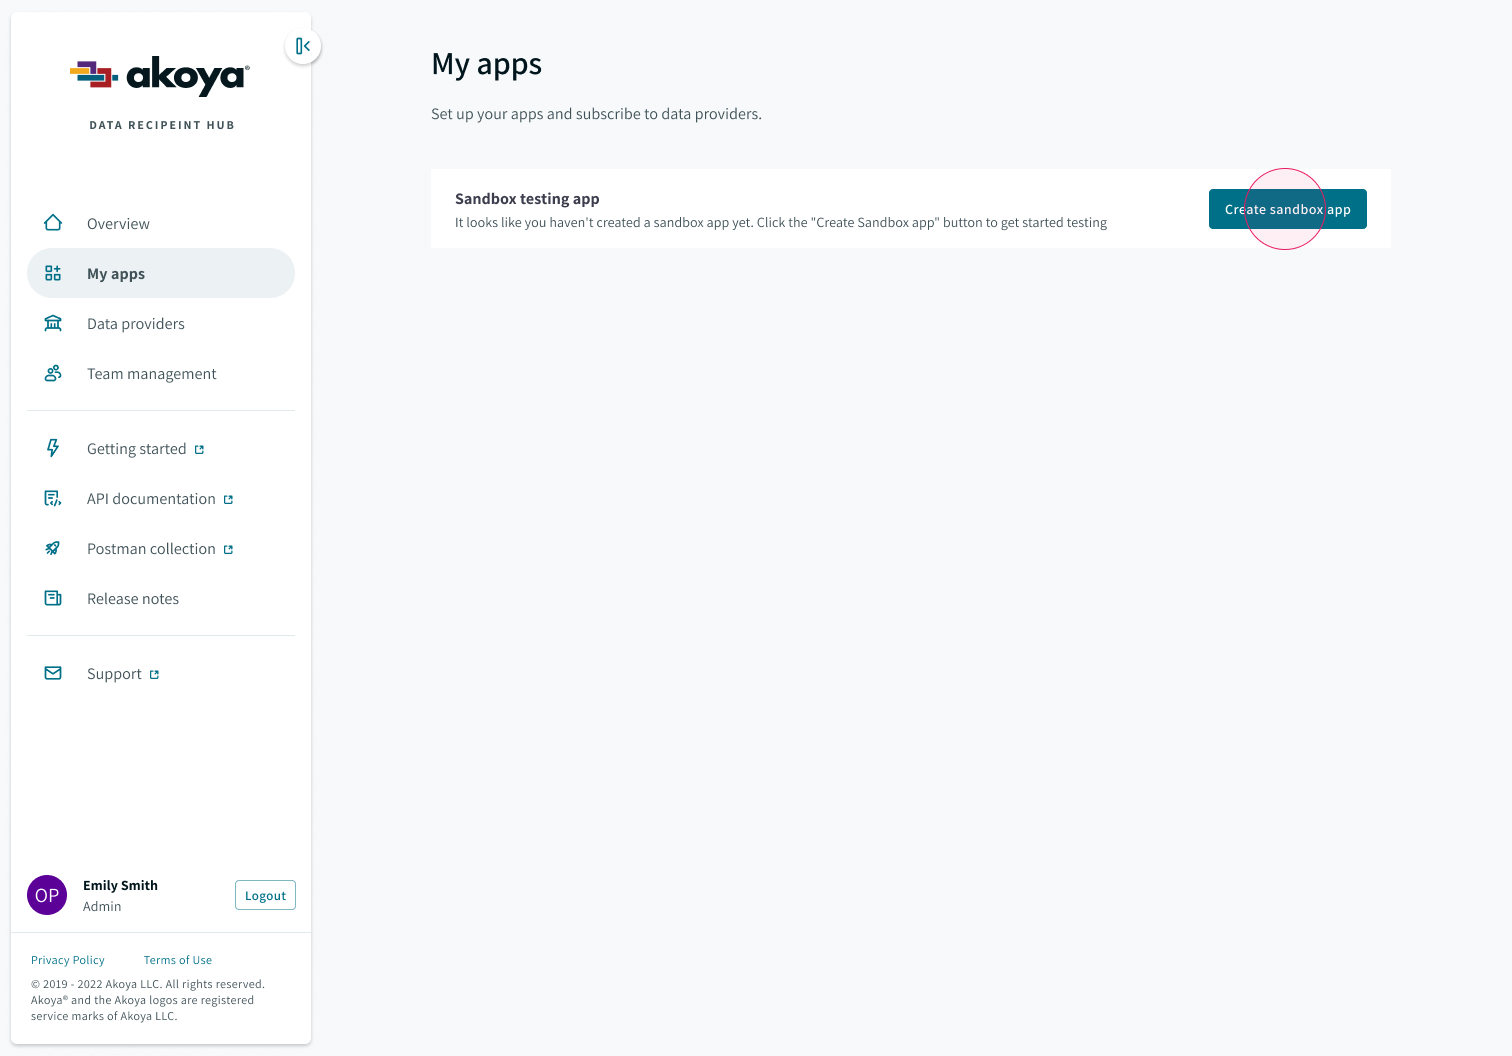
When you log into the Akoya Hub for the first time and visit the “My apps” section, you’ll see the following screen, inviting you to register your app in our sandbox environment. Click “Create sandbox app.”
Next, click “Download credentials.” A CSV file download will trigger, containing your client ID and secret.
Client secrets can only be downloaded once
Please save your client secret in a safe place. If you lose it, you'll have to reset it.

A sandbox app entity will be created with a randomly-generated client ID and placeholder redirect URI that you can modify later to your own app’s redirect URI.
More info on redirect URIs
See the “Getting started” page for more information on redirect URIs.
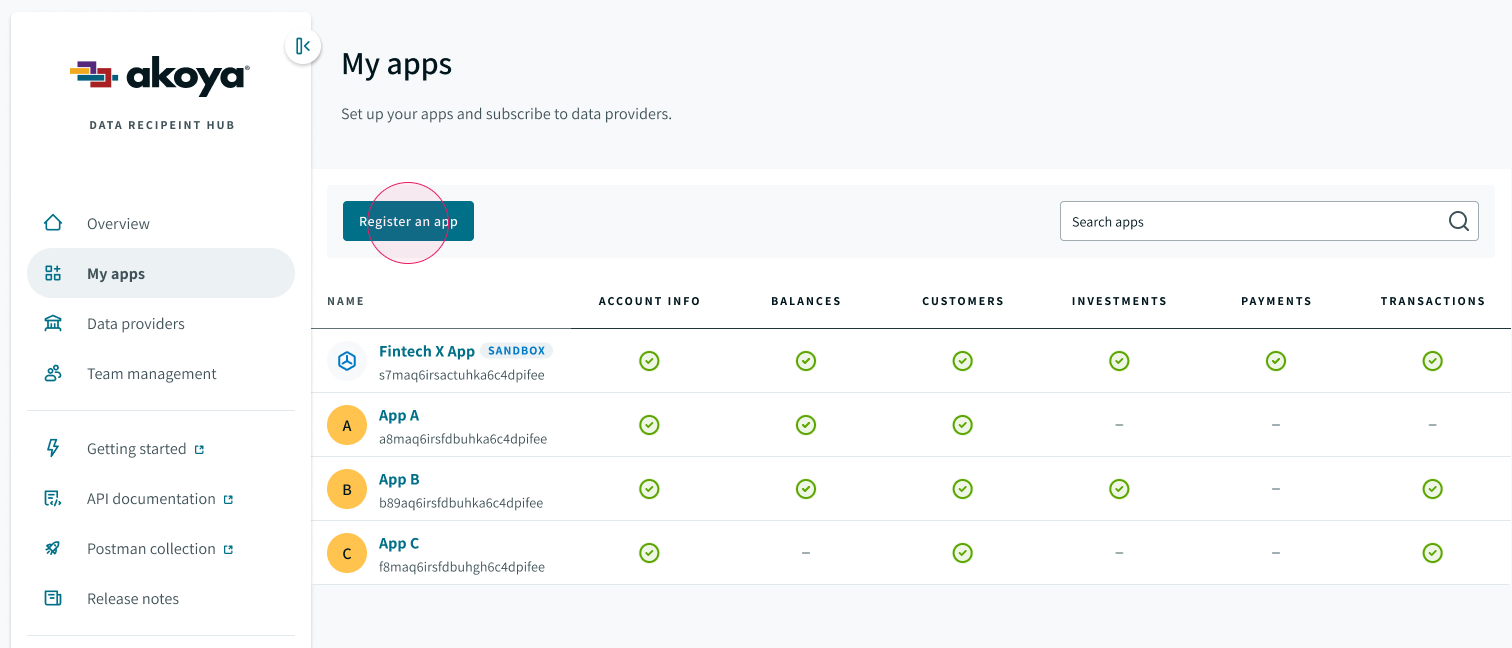
Once you register your app, you can return to the “My app” page to reference information about it.
Requesting production access
When you’re ready to move an app into production, an authorized stakeholder at your company will need to fill out the onboarding questionnaire. You'll only need to fill this form out once.
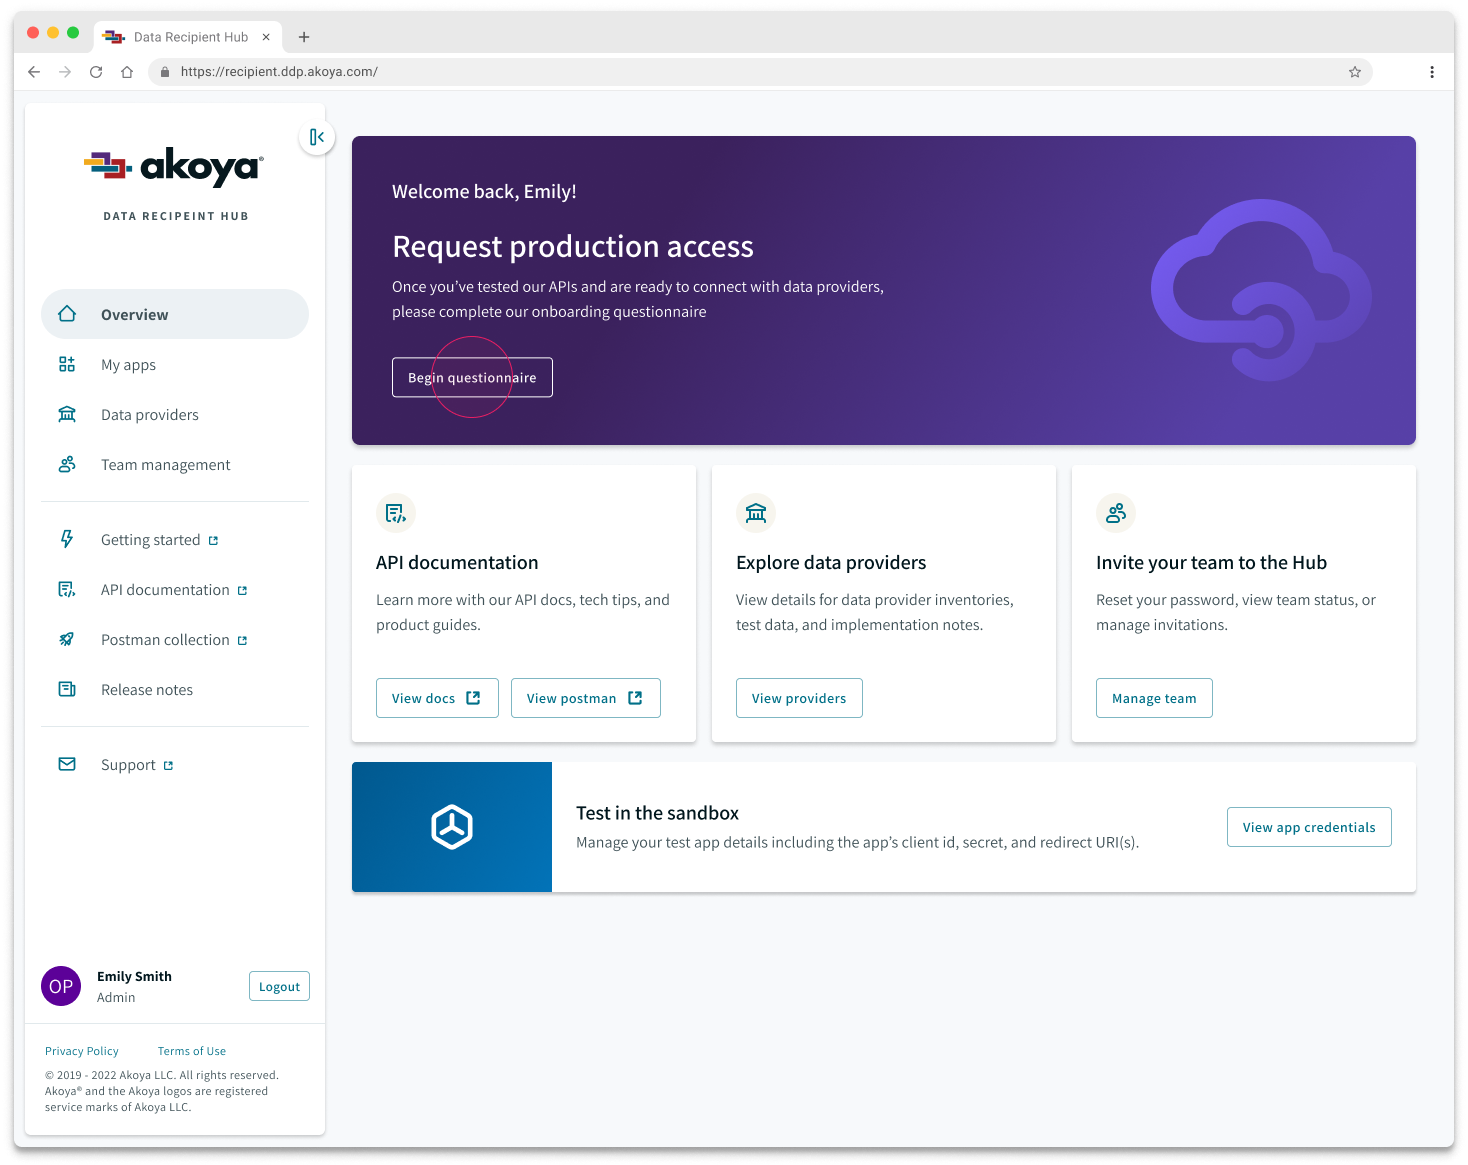
Navigate to the overview page and click “Begin questionnaire.”
The form covers several topics, including:
- use cases you're interested in
- how your company consumes financial data
- actual and anticipated API call volume
- number of users supported
- technical readiness
- security controls
Form progress cannot be saved!
If you navigate away from the form before clicking the “Submit” button, your progress will be lost. If desired, you can download a PDF copy of the form to pre-plan your answers.
After you submit the questionnaire, you’ll be taken to a confirmation screen. You’ll also receive an email confirmation with a reference number should you have any questions.
Our staff will review your submission and reach out to you regarding next steps.
Registering a production app
After you've been granted production access, you’ll see a new “Register an app” button in “My apps.”
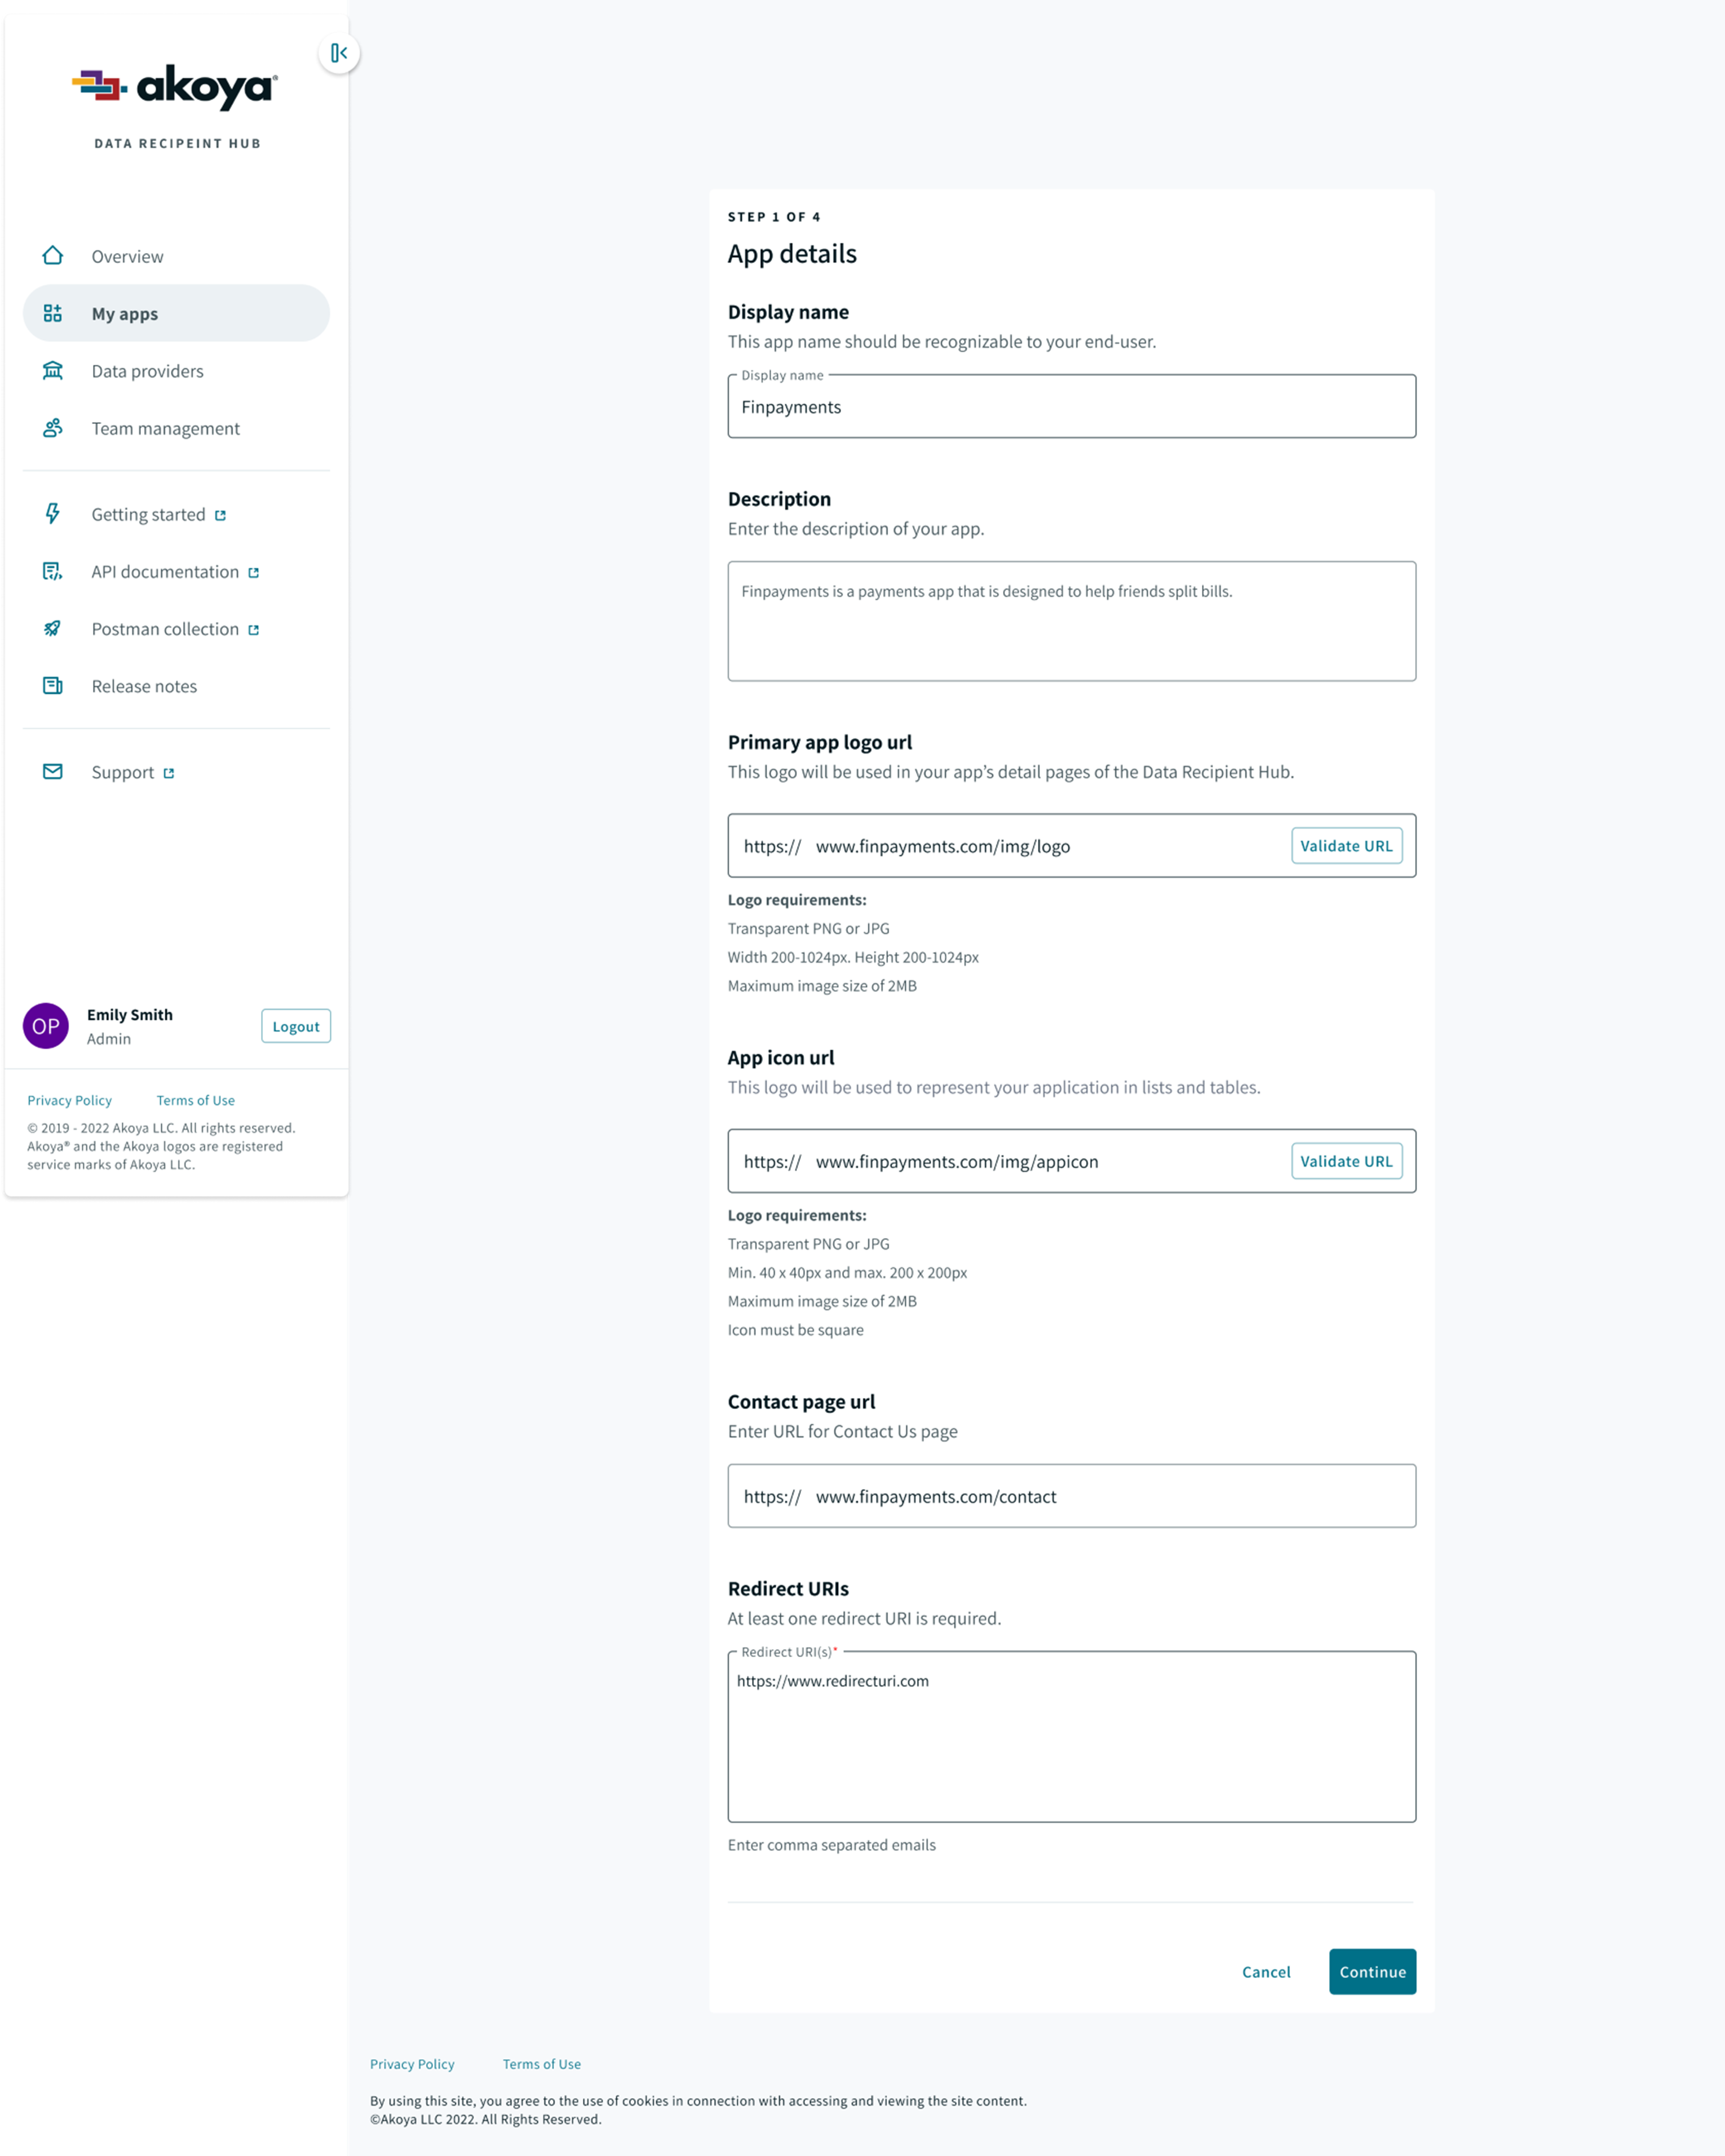
A registration wizard will open. The first page asks for various app details, such as redirect URI(s) and support contact email address(es). These fields are explained in more detail in the "Modifying app details" section. Click "Continue."
Select the Akoya products you want to enable for this particular app. Click "Continue" when finished.

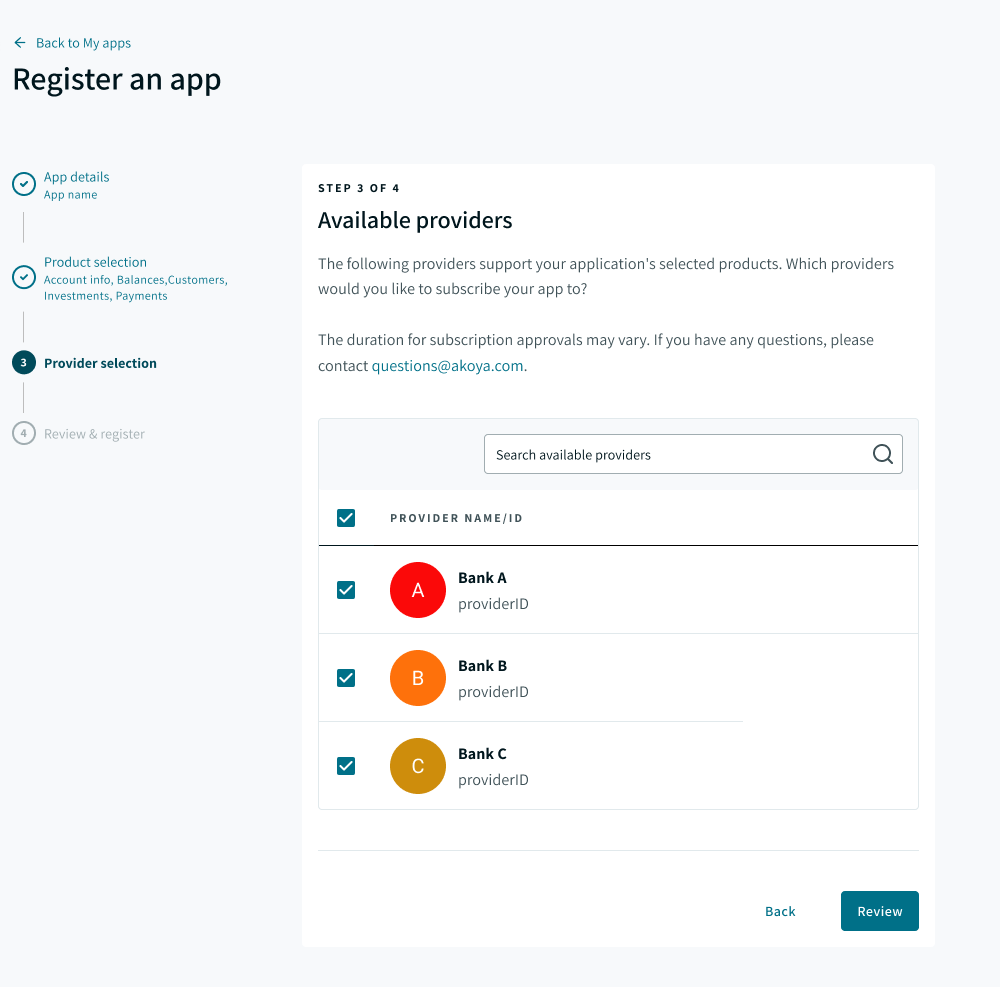
Select the providers you'd like to subscribe your app to. Subscribing to a provider will enable your app to pull in data from that institution for customers who have granted explicit permission. Click "Review."
Verify that all provided details are correct and click "Register app" when satisfied.

Your new app will now show up on the “My apps” page. The first time you view this page, a button will display to the right of the client secret field, allowing you to download your credentials. As with a a sandbox app, this download button can only be used once. If you lose your client secret, your only option will be a reset.
Client secrets can only be downloaded once
Please save your client secret in a safe place. If you lose it, you'll have to reset it.
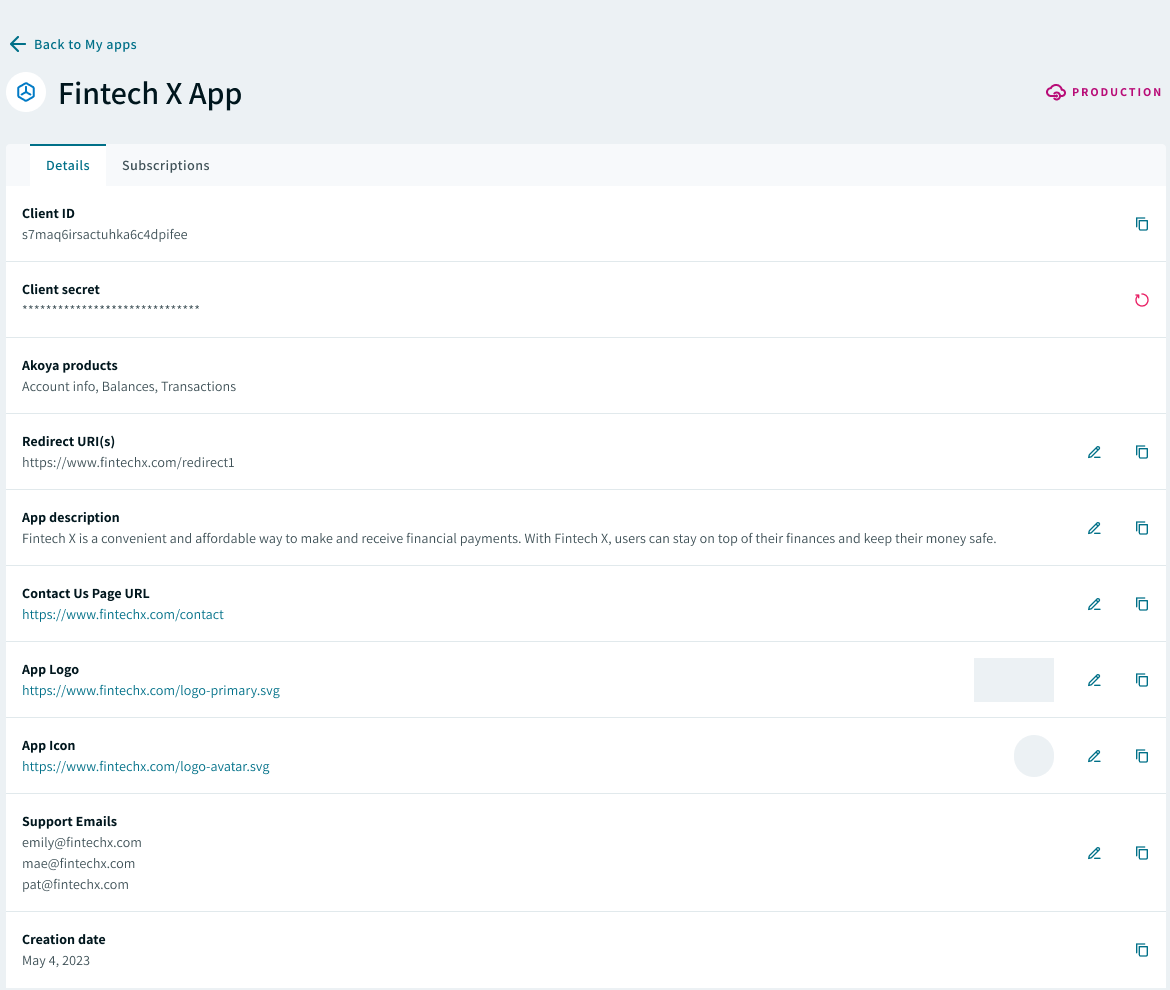
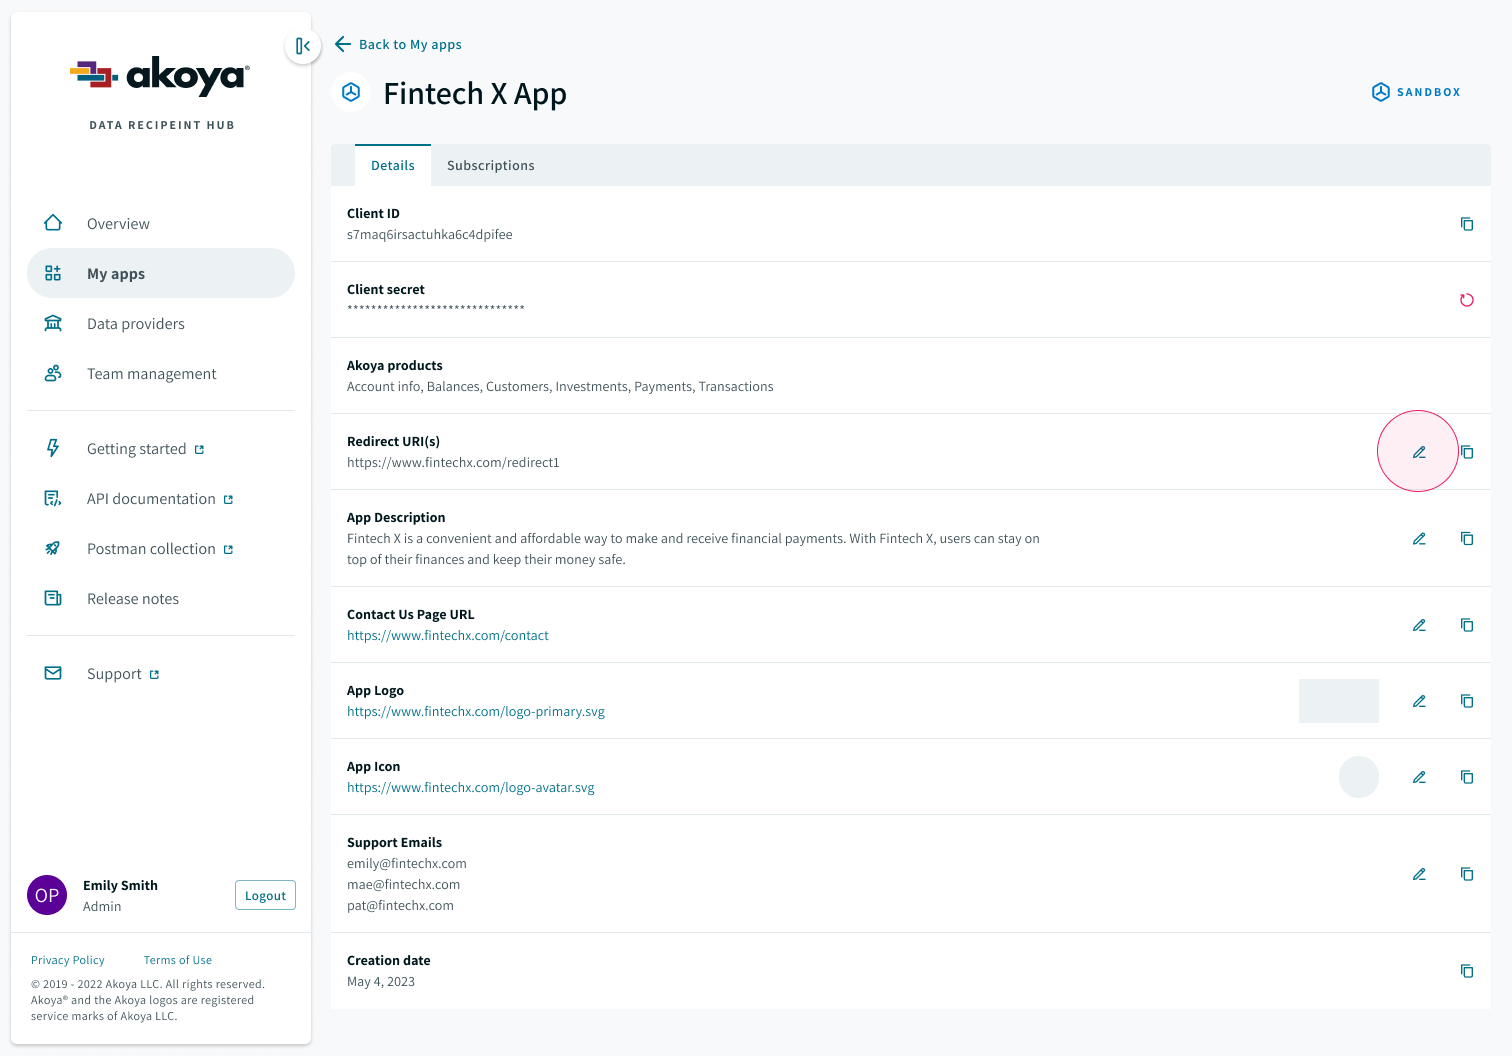
Viewing/modifying app details
The “Details” tab displays the following information and functionality:
- client ID (view and copy)
- client secret (reset only)
- Akoya products (view only)
- redirect URI(s) (view, copy, and edit)
- description (view and edit)
- contact URL (view and edit)
- app logo (view and edit)
- app icon (view and edit)
- support email(s) (view and edit)
- creation date (view)
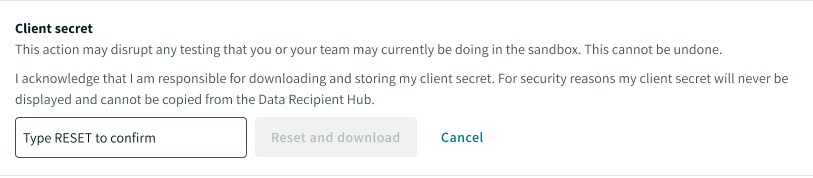
Resetting your client secret
Click the reset icon next to the "Client secret" line item.
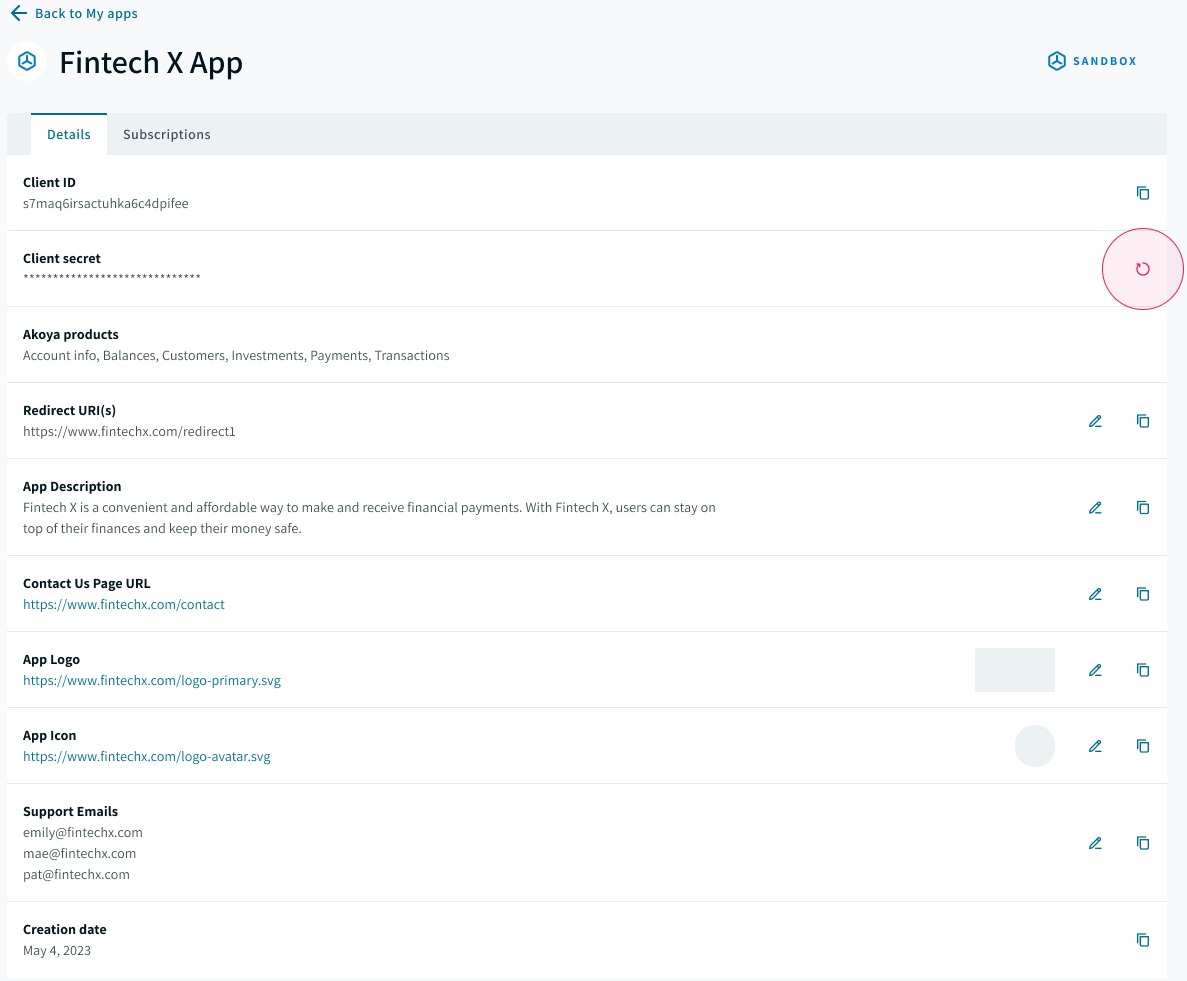
You’ll receive a warning message about potential service disruption after the reset. A button will appear, allowing you to download your new client secret. The screenshot below shows a sandbox app, but the process is the same for a production app.
Modifying your redirect URI
If you’re adding multiple URIs, separate each one with a comma and click “Save.”

Modifying logo and icon URLs
The app logo and icon requirements are discussed in the "Team management" section. Requirements for company and app logos/icons are the same.
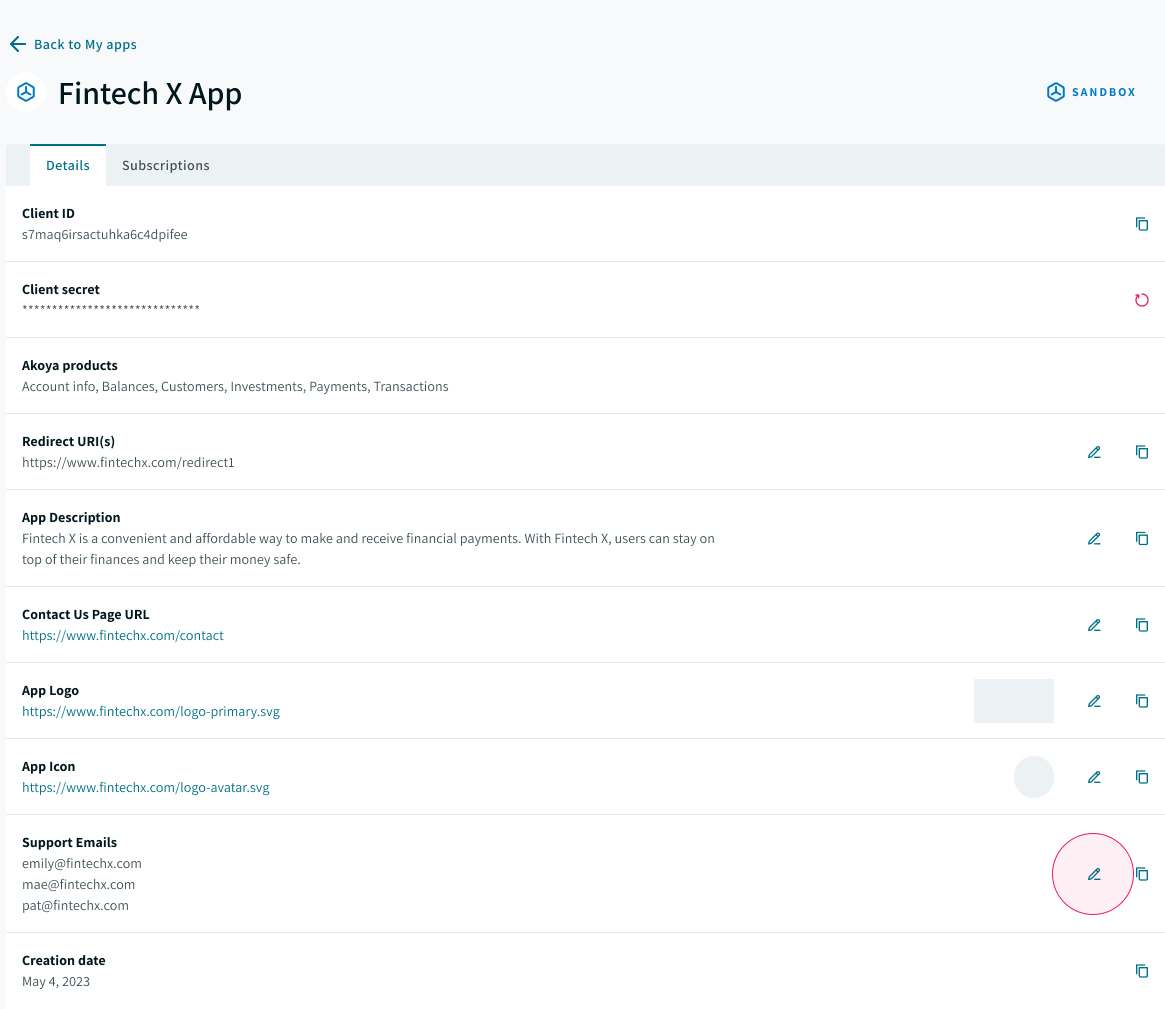
Modifying support email(s)
Click the pencil icon next to “Support emails” to edit. Separate multiple email addresses with commas. Akoya technical support notifications and alerts will be sent to the emails specified here.

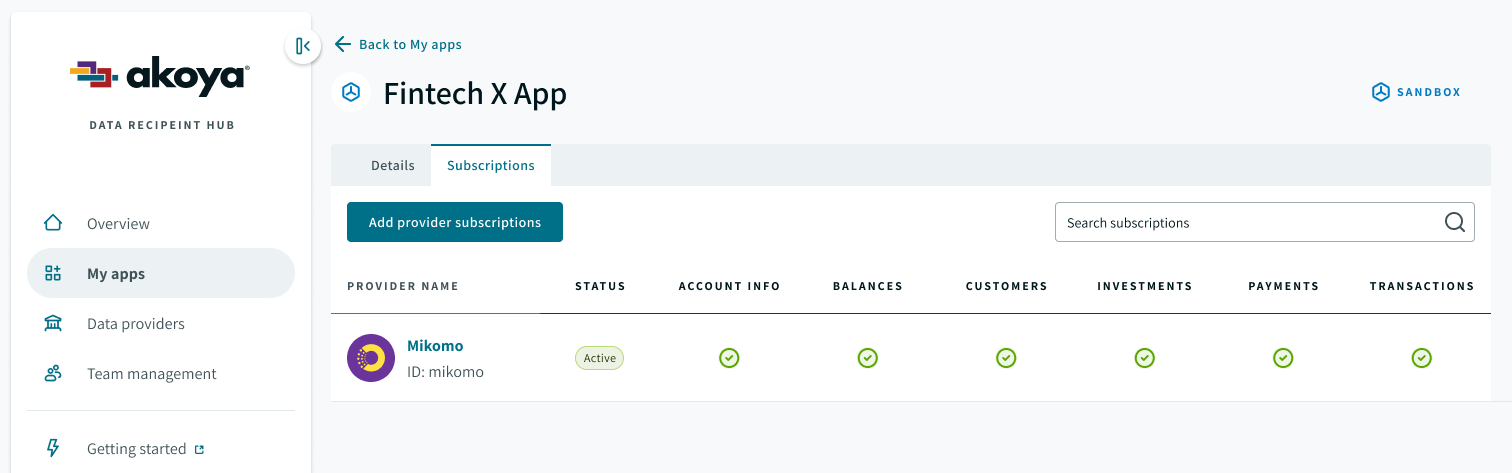
Viewing your subscribed providers
The “Subscriptions” tab displays all your subscribed providers, subscription status, and which Akoya products are enabled. For your sandbox testing app, the only provider will be our mock financial institution, Mikomo.
Once your app is in production, you can also request new provider subscriptions from the "Subscriptions" tab.
Click "Add provider subscriptions."
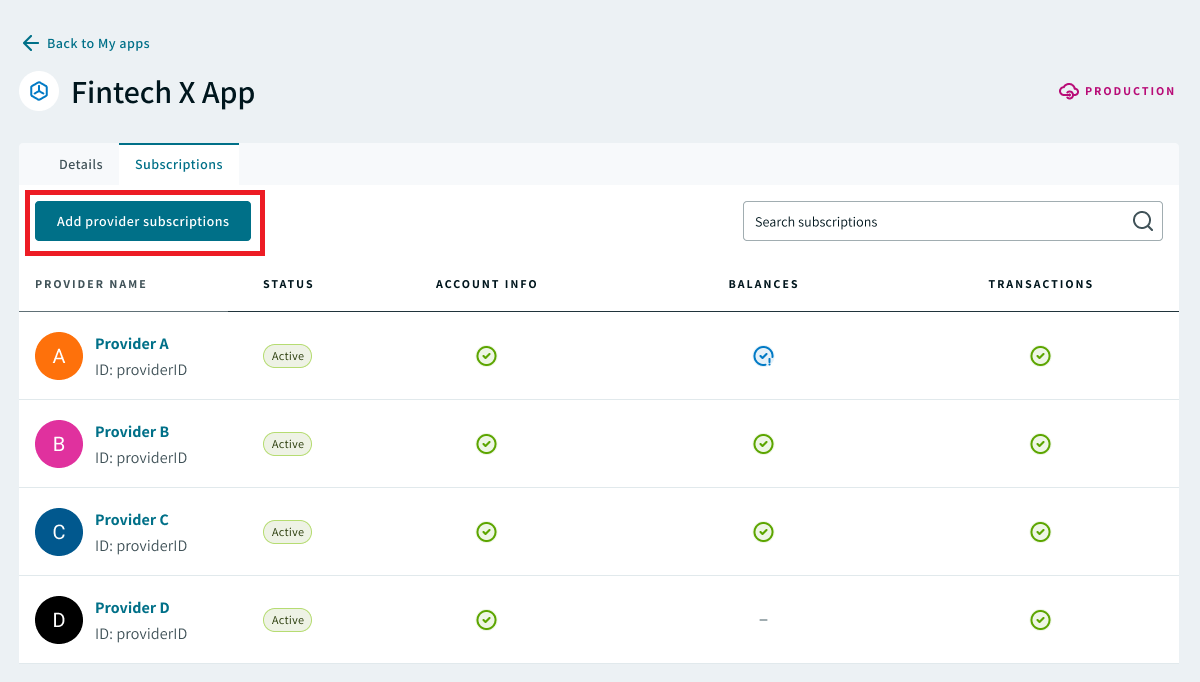
Check the box(es) next to the provider(s) you want to subscribe to, and click "Request subscription." The provider status will change to either active or pending, depending on that provider's policy regarding subscription requests.
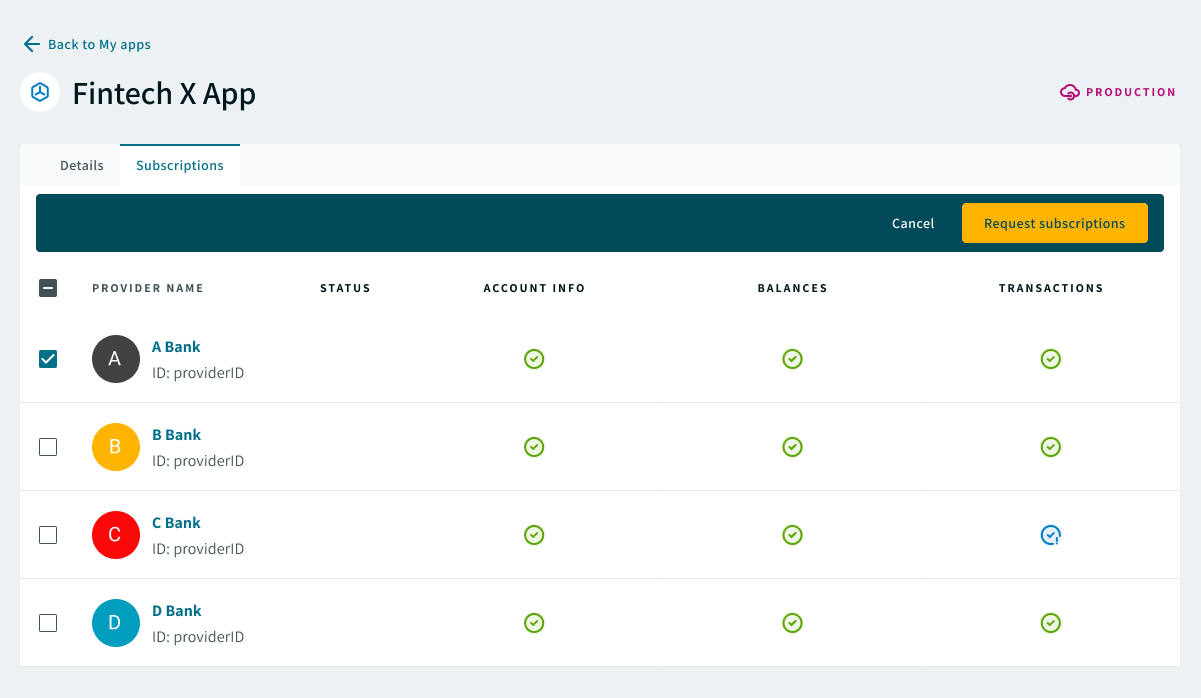
Provider subscription statuses
| Status | Description |
|---|---|
| Active | Your subscription is enabled. Data from this provider is available to this app. |
| Pending | Your subscription request is under review. |
| Suspended | The provider has temporarily paused your subscription. Data from this provider is unavailable to this app. Please reach out to your Customer Success Manager for further assistance. |
| Denied | The provider denied your subscription request. Data from this provider is unavailable to this app. Please contact your Customer Success Manager for further assistance. |
Clicking on a provider will take you directly to that provider’s documentation and inventory page within the “Data providers” section.
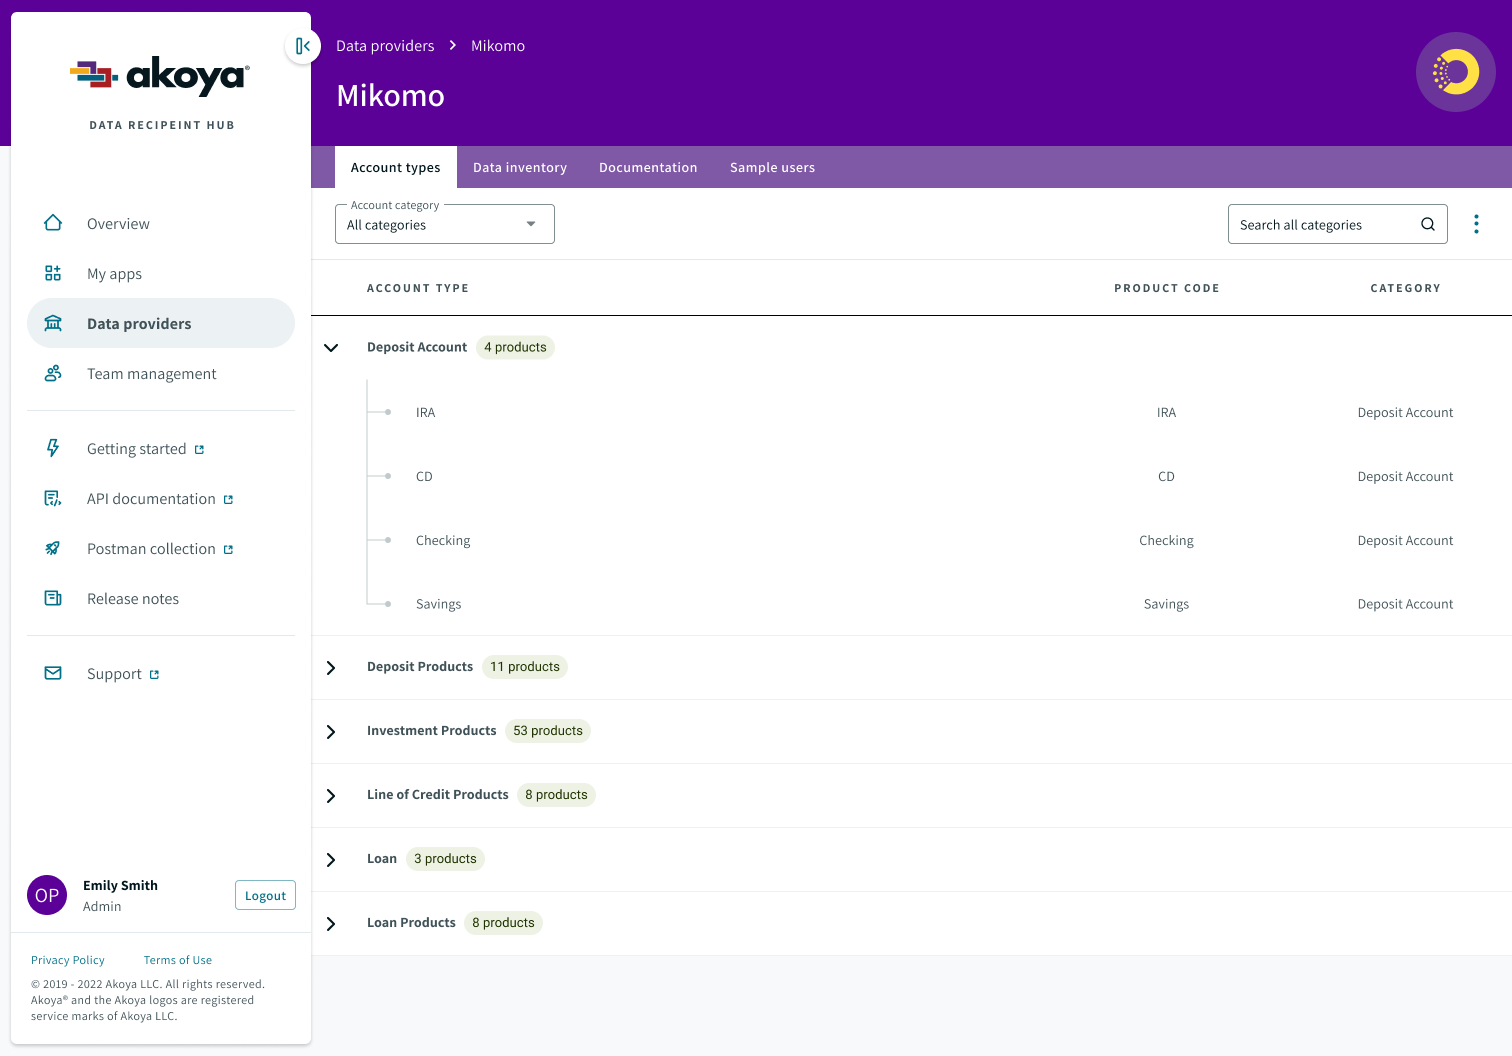
Here, you can view specific documentation pertaining to that provider, organized into tabs. The provider pages will be discussed in the next section.
Updated almost 2 years ago